Saturday, June 29, 2013

Baked Brownies

I love brownies.
I am very specific about what kinds of brownies that I love though.
My favorite brownies were at Sarah's Pastries and Candies.
But that lovely shoppe closed... and I am super upset about it

http://www.tripadvisor.co.uk/LocationPhotoDirectLink-g35805-d1764340-i32809523-Tastebud_Tours_Chicago_Food_Tours-Chicago_Illinois.html#32463616
I mean woah...

By the way, I am currently watching the CBS show, The American Baking Competition...
How can I get involved with this!!!
Seriously though! I am looking it up and it says that there are local competitions that you need to win first, and you have to have an interesting background... I have an interesting background!
I am interesting!

Anyway, help me if you can... this is a sad, public, and embarrassing plea.

Back to my brownies...
So this is the classic Baked Brownie recipe, from the lovely Brooklyn Bakers, Matt Lewis and Renato Poliafit. Their cookbooks are the best and you must purchase them NOW, here.
Seriously next time I am in New York, which will be in a few weeks... I am going to this bakery!
It's on my bucket list.

Well, anyway, when I was making these brownies


My go to recipe! I realized I didn't have any granulated sugar. 
WHAT?
Never happens to me. But it did. I was mortified. So I decided to experiment with...
Turbinado Sugar!
More commonly known as, Sugar In The Raw.

It was such a success! As you can see in the picture above, it crystalized as it baked and left the brownies with a delicious crispy crust, but didn't affect the extremely moist, fudgy, chewy insides!

I also added a good amount of instant espresso to my batter so don't eat these too late at night...
Good luck fellow bakees!


Yummmm.

Baked Brownies
Adapted from Baked
Yields about 24 Brownies
  • 1 1/4 cup All-Purpose Flour
  • 1 teaspoon Salt
  • 2 tablespoons Unsweetened Cocoa Powder
  • 11 ounces Dark Chocolate (I use 60-70%, Scharffen Berger is the best!)
  • 1 cup Unsalted Butter, room temperature, cut into pieces
  • 1 tablespoon Instant Espresso Powder
  • 1 1/2 cups Turbinado Sugar (or regular sugar!)
  • 1/2 cup Light Brown Sugar, packed
  • 5 Large Eggs, room temperature
  • 2 teaspoons Vanilla Extract
Preheat oven to 350. Line a 13x9" pan with parchment paper and butter the bottom and sides.

Whisk together flour, salt, and cocoa powder in a small bowl. Place the chocolate, butter, and espresso powder in a large heat proof bowl. Melt in the microwave on high in 30 second intervals until smooth, stirring in between each interval. Add the sugars to the butter mixture and whisk until blended. Add three eggs and whisk until combined. Whisk in the vanilla. Add the remaining eggs and whisk until just combined. Do not over mix your batter! The brownies will be too airy and not fudgy!

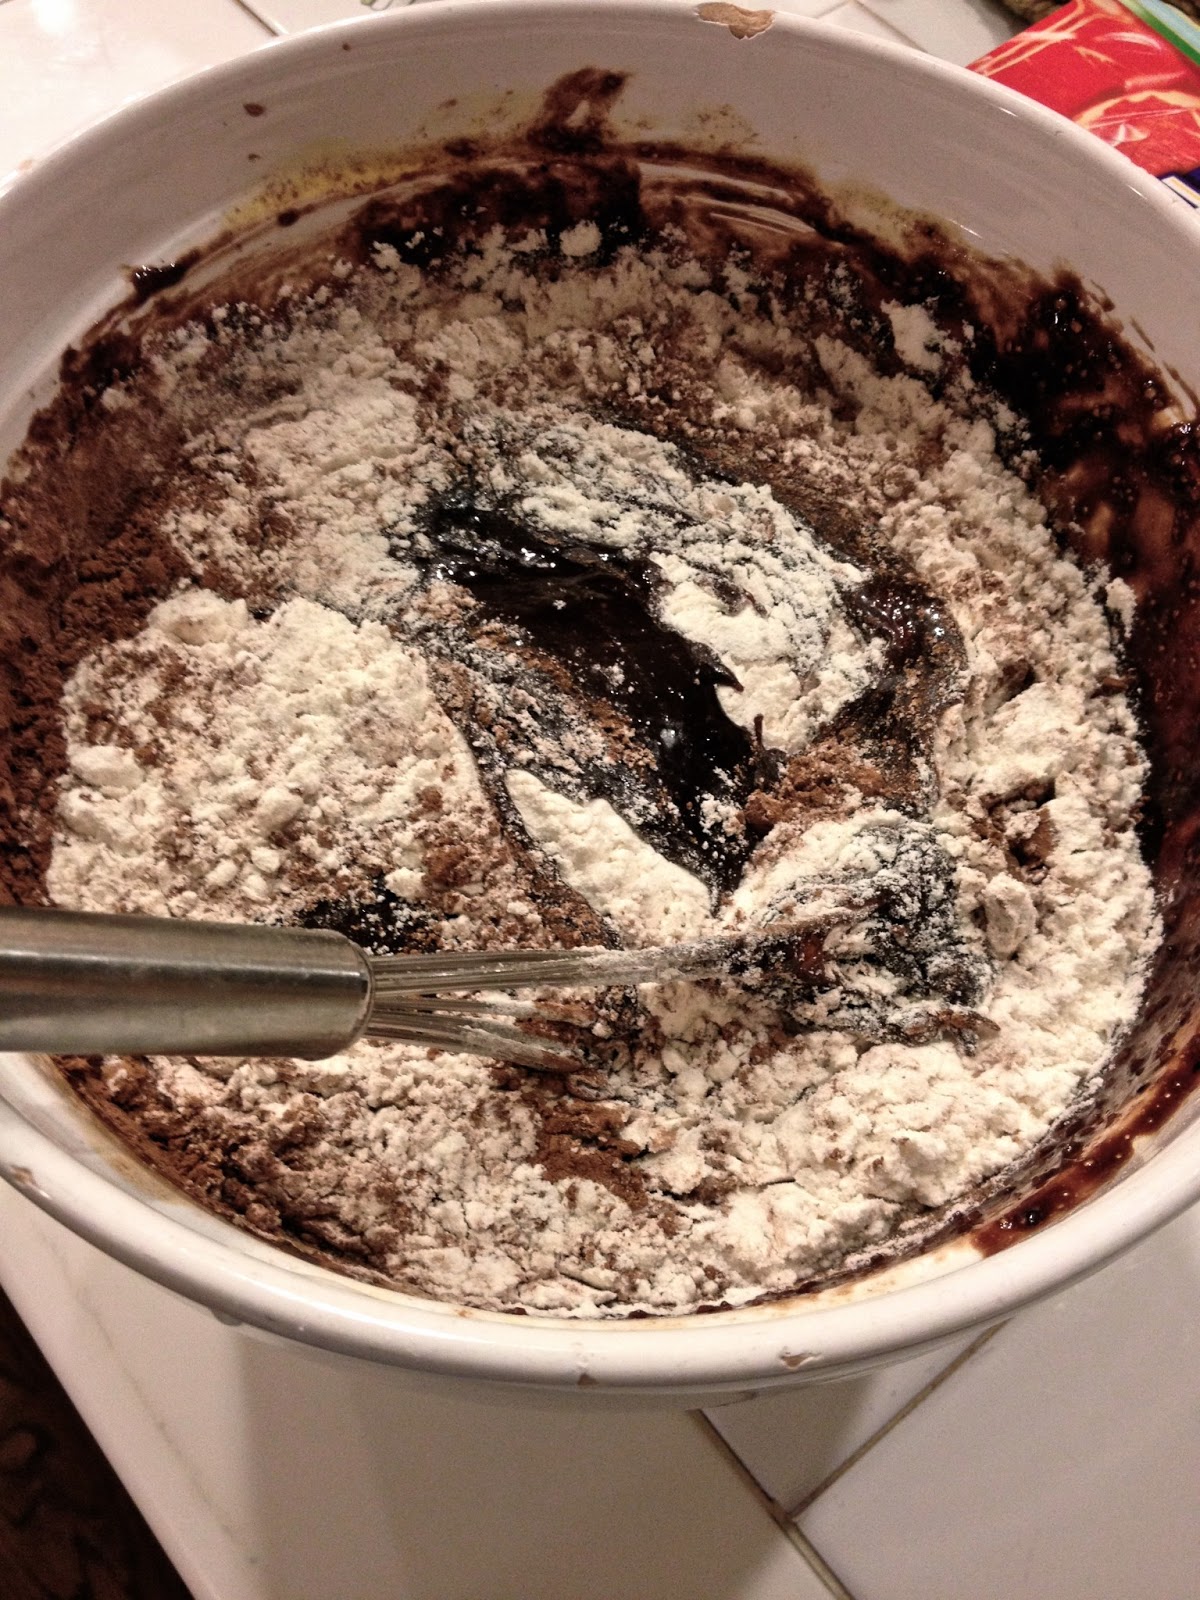
Now, sprinkle the flour mixture over the top of the chocolate mixture. Carefully fold the flour in and again, do not over mix! You should still have a few streaks of flour when you pour the batter in to the pan. Spread the batter evenly and place in the oven for 30 minutes! Don't over bake them, just trust that 30 minutes is going to be enough! If you're really unsure and your oven's temperature is off, a toothpick inserted into the center should come out with a few moist crumbs!

Let cool and serve! 

Thursday, June 27, 2013

GO BLACKHAWKS Sugar Cookies

What did I do last night?


I may or may not have seen the Stanley Cup at The Wit...


And stalker-ly took this picture of Toews...


And danced near with Shaw...


And partied with Viktor Stalberg....


And his mom!

But the best part of this crazy night, was sitting in a corner with Seabrook's mom for fifteen minutes showing her my blog/these cookies!


This is just my basic sugar cookie recipe that I have already posted here!
I cut out the dough using my jersey cookie cutter.


After coating them in a thick layer of white royal icing, I piped a few of these cutie Hawks logos!
I used parchment paper with a printed image underneath to get them perfect.
Check out my tutorial to learn how to do this!


(I didn't have room for the orange feather!)

I let these dry overnight and then I carefully peeled them off and used some more icing to adhere them to the center of the cookies! Then I did some fun other decorations just for kicks!

GO HAWKS!


Hjalmarsson Baby!

See you all at the parade tomorrow!

Monday, June 24, 2013

Apple Cinnamon Rolls

I made these two days in a row because they were so freaking good.


The first time I put some almond extract in the frosting. I loved it, however my brother, Teddy, thought it tasted like chemicals and strongly advised me against using that recipe again...
My brother, Andy, also played a big role in this recipe. About five days ago I received a voicemail with Andy's insanely strong Chicago accent... "Hey clayyyyyre, I hayve like a bushel and a hayf, like one-hundred and fifty... aypples."
So, he brought home these thousands of apples


Basically, I'm solely going to be baking with apples for the next week.

I decided to add finely chopped apples to a thick cinnamon filling and stuff it inside a really great sweet dough recipe. 


I do have a very, very serious warning.
When making the filling, please, for the love of God, do not melt the butter.
Or you will end up with a mess like this...


I thought it would help me make them faster but just, don't do it. It's too messy and makes it take way longer.

Enjoy these delightful breakfast treats!


Apple Cinnamon Rolls

  • 1/2 cup Unsalted Butter
  • 1 cup Milk, I used non-fat
  • 2 1/2 teaspoons Active Dry Yeast
  • 1/2 cup Sugar
  • 2 Large Eggs, room temperature
  • 1 teaspoon Salt
  • 4 1/2 cups Bread Flour (You can use all-purpose if you don't have bread flour)
Preheat oven to 150

Melt butter with milk in a small saucepan. Once melted place in the bowl of a stand mixer and let cool to 115 degrees. Sprinkle yeast and one teaspoon of the sugar over the mixture, stir slightly and let sit for about five minutes until bubbly/foamy. Add the rest of the sugar, the eggs, and the salt and mix on low speed with the paddle attachment. Add 4 cups of the flour and mix until combined. Switch to a dough hook and add the rest of the flour. Mix for about 3 minutes on medium-low speed until the dough is smooth and elastic. 

Turn dough on to a lightly floured surface and knead for about two minutes. Place dough in a lightly oiled bowl and cover with a towel. Turn off the oven and place the bowl in the oven for 1-2 hours, or until dough has doubled in size.

Cinnamon Filling (Prepare once dough has doubled in size)


  • 2 Apples, peeled
  • 1 cup Unsalted Butter, softened not melted!!!
  • 1 cup Light Brown Sugar
  • 3 tablespoons Cinnamon
  • 1 teaspoon Salt
  • 1/2 teaspoon Freshly Grated Nutmeg
Press down the dough in the bowl and turn onto a lightly floured surface. Let rest while you prepare the filling.

Dice the apples into small 1 cm. sized pieces.

Blend together butter, brown sugar, cinnamon, salt, and nutmeg in a small bowl. Stir in the apples and place in the fridge.

Butter a 13"x9" pan.

Roll out the dough into a 12"x20" rectangle. Spread the apple cinnamon filling all over the dough and roll into a tight log, pinching at the seam. Slice 12 rolls, using a bread knife, and place in the pan. I slice into quarters than slice each quarter into thirds to get even slices.

At this point you can either preheat the oven to 350, or place the rolls in the fridge, covered, for up to 3 days.

If you choose to bake refrigerated rolls, let them sit out for a half hour before baking.
Place in the oven for 30 minutes, turning the pan halfway through.
To check for done-ness, you can use a fork to peek inside the rolls, they should look fluffy and no longer wet.

Let cool for about ten minutes before putting on the icing.

Maple Icing

  • 1/2 cup Unsalted Butter
  • Half a Brick of Cream Cheese, 4 oz.
  • 2 tablespoons Maple Syrup
  • 1 teaspoon Vanilla
  • 1 1/2 cup Powdered Sugar
Blend all ingredients until smooth. Spread desired amount on rolls! Everyone in my family likes different amounts so we ice ours personally.

Wednesday, June 19, 2013

Chewy Sugar Cookies

"If you put these cookies on your windowsill, I will steal them..."


Said by an anonymous cookie psycho.

I love a crispy, buttery, shortbread cookie.
But, I really love a crispy, buttery, chewy, lemony, sprinkled sugar cookie.
This recipe is adapted from Martha Stewart's Old Fashioned Sugar Cookie recipe.
I know everyone seems to hate Martha for her scandal back in 2002, but like, give her a break.
She is only the most creative person to live since um, Julia Child. 
My two favorite people in the whole wide world!!!

Martha has about 6 million sugar cookie recipes to choose from, and I'll tell you. I've tested them all. This one is by far the best.
I mean I changed the recipe a little, but her version is just as good.

You can decorate the dough with any sprinkles you like


They bake up perfectly and you can bake them slightly crisper if you're like my dad and me.
I made some Fourth of July/Memorial Day/Labor Day ones as well


So freaking cute!
And delicious!
Enjoy!

Chewy Sugar Cookies
Adapted From Martha Stewart
Yields 3 dozen
  • 1 3/4 cup Sugar
  • 1/4 cup Light Brown Sugar
  • Zest of One Lemon
  • 2 sticks Unsalted Butter, room temperature
  • 2 teaspoons Vanilla
  • 2 Large Eggs
  • 3 cups Flour
  • 1 teaspoon Baking Soda
  • 1 teaspoon Salt
  • Sprinkles/Sanding Sugar to coat
Preheat oven to 350.
Beat together sugars and lemon zest in a large bowl. Add butter and blend on medium-high speed until fluffy, about 3 minutes. Add vanilla and blend, then scrape down the sides. Add eggs, one at a time, blending well after each addition. Scrape down the sides of the bowl.
In a separate bowl whisk together the flour, baking soda, and salt. Gradually add to the butter mixture.

Scoop 2-tablespoon-sized balls of dough and roll in desired sugar. You can use regular sugar if you want but I like to use jimmies best! Place about 2 inches apart on a parchment-lined baking sheet. I can fit anywhere between 6-8 on one sheet. Bake for 13-16 minutes until edges are golden. If you want chewier cookies the centers should still be pretty puffy. If you want crispier cookies bake for the full time.

Tuesday, June 18, 2013

Ginger Crinkles

Sometimes I wish I was a Christmas elf.

I kind of am. I love Christmas. I love making/giving gifts. I love making/decorating cookies. I love cold weather. Red and green are my favorite colors. My favorite genre of music is Holiday. 
I pretty much celebrate all year long.

It's not even Christmas day that gets me going.
It's the wonderful time leading up to that magnificent day (which is all year long?)
So it shouldn't come as much of a surprise to you that I made the most comforting, Christmas-y cookie on the hottest day of summer so far.


This recipe is one of my family favorites. I wouldn't say it's a "secret" recipe, because I bet if you google search, Ginger Crinkles, you'll get a recipe quite similar.
It is a recipe that is dear to my whole family though!
My mom and I always laugh because every time we bake these cookies, they turn out just sliiiiightly different.
Sometimes they're darker, thinner, lighter, thicker, chewier, softer, fluffier... you get the point.


They're super easy to make, I just stir them by hand. The ingredients don't really have to go in the bowl in any particular order.
We tend to just throw them all in a bowl and stir.
In fact, scribbled on a little notecard, I believe the recipe states:
"Place ingredients in bowl. Mix well."

Easy peasy.
Enjoy fellow elves!


Ginger Crinkles

Yields about 3 dozen
  • 2/3 cup Canola/Vegetable Oil
  • 1 cup Sugar
  • 1 Large Egg
  • 1/4 cup Molasses
  • 2 teaspoons Vanilla
  • 2 cups Flour
  • 2 teaspoons Baking Soda
  • 1 teaspoon Salt
  • 2 teaspoons Ginger
  • 2 teaspoons Cinnamon
  • Sugar for rolling
Preheat oven to 350. 

Mix together oil, sugar, egg, molasses, and vanilla in a large bowl. In a separate bowl, whisk together flour, baking soda, salt, cinnamon, and ginger. Stir the flour mixture into the sugar mixture.
Roll into 1 inch balls and roll these in sugar. Place about an inch apart on a parchment-lined baking sheet.
Bake for 10-13 minutes depending on how crisp you like them!


Sunday, June 16, 2013

Rootbeer Chocolate Cupcakes

Happy Father's Day!!

This morning I woke up and decided I wanted to recreate the Walker Brother's Pancake House's Apple Pancake. It was actually pretty spot on! I need to tweak it a little and then I will post. We also made some jalapeno-chicken sausage-hash browns. They were so yummy.
I was so busy eating/making them that I forgot to take pictures, but I'm sure I will make them again soon!

Tonight we are going to Sun Wah BBQ. We have been going here almost every year for Father's Day with my family, my cousins, and my Grandfather.
My Grandfather, who goes by MOT, loves the Peking duck at this restaurant.
I hate it.
I stick to fried rice here.
However, my whole family thinks it is fabulous,  so you should all go.
Maybe after we can get some delicious dessert at Hoosier Mama pies, although so far my sugar intake today is through the roof...
Croissants, apple pancakes, cookie, cupcake, arnold palmer... I don't know if I can take anymore.


These cupcakes look exactly like the ones I made last year.

(Father's Day 2012).

However this year, I perfected the chocolate cupcake recipe. I filled them with a delicious root beer buttercream. And, I think I am more skilled at decorating than one year ago.

I've made lots of cakes/cupcakes that involve root beer extract. It makes things taste so delicious and you just get a slight hint of root beer.
You can use a pastry bag to fill the cupcakes like this:


But, if like most people (or not most people? I don't know anymore), you don't have pastry bags and tips, you can use an apple corer to take the center out of the cupcakes. Then you simply spoon the filling into the hole.
Either way, you'll end up with a million stuffed cupcakes.


Then you take a big scoop of this delicious vanilla buttercream,


And spread it all over the tops of the cupcakes. You want to make it kind of flat on the tops so that the golf balls won't roll off!


You can always just stop here. Or decorate them however you want?
But what I did, was dunk these cupcakes in a big bowl of green sugar.


What a nice green course!


Then you take a small spoon, and little by little you scoop some graham crackers on. I like to press a little hole in the center with my finger so you really achieve the sand trap look.


Then you can choose to add little white dragees as golf balls, or signs to indicate which hole is which!
Be creative and have a great Father's Day!!


Chocolate Cupcakes

Yields about 18 cupcakes
  • 1 1/2 cups Boiling Water
  • 3/4 cup Unsweetened Cocoa PowderY
  • 2 teaspoons Instant Espresso Powder
  • 1 2/3 cups Flour
  • 3/4 teaspoon Baking Powder
  • 1 teaspoon Baking Soda
  • 1 teaspoon Salt
  • 6 tablespoons Unsalted Butter, room temperature
  • 1 1/4 cups Sugar
  • 1 teaspoon Vanilla
  • 1 teaspoon Root Beer Extract
  • 2 Large Eggs, room temperature
Preheat oven to 350 and line two muffin tins with muffin cups.
Whisk together boiling water, cocoa powder, and espresso powder in a liquid measuring cup. Set aside.
In a large bowl, beat together the butter and sugar on medium speed with an electric hand mixer. Add the vanilla and one egg, blend well. Scrape down sides and add the other egg, blend until fully incorporated. 
In a smaller bowl, whisk together the flour, baking powder, baking soda, and salt. Add to the butter mixture alternating with the cocoa-water mixture in three additions. Blend just until all flour is incorporated.
Fill each muffin cup about 3/4 of the way up, I use an ice cream scoop! You probably won't be able to fill all 24 muffin cups.
Bake for about 13-15 minutes until the tops of the cupcakes spring back when lightly touched.
Let cool before frosting!

Root Beer Buttercream

Yields 1 cup, enough to fill 18-24 cupcakes
  • 1 stick Unsalted Butter, room temperature
  • 1 1/2-2 cups Powdered Sugar
  • 3 teaspoons Root Beer Extract
  • 1 tablespoon Root Beer
Blend all ingredients until smooth. Place in a pastry bag with a #6 round tip. Inject the tip into the cupcakes and squeeze for about three seconds.

Vanilla Buttercream
Yields about 2 cups, enough to frost 18-24 cupcakes
  •  2 sticks Unsalted Butter, room temperature
  • 3 cups Powdered Sugar
  • 1/4 cup Heavy Cream
  • 1 teaspoon Vanilla
Blend all ingredients until smooth. Frost cooled cupcakes as desired.


Saturday, June 15, 2013

Baked French Toast

Two nights ago I went to this new restaurant in Glencoe.
Guildhall, have you heard of it?
It was amazing... which is shocking for restaurants that are not in the city.
I mean, even the bread you get at the beginning was freaking delicious. It came with a lightly sweetened butter. Ahhh! Pure bliss!

I ordered the Guildhall burger, it was outrageous. It was on a pretzel bun, which if you have never had pretzel bread/buns, stop reading this post and run to the nearest grocery store and get some.
I had my burger medium-rare, which they achieved perfectly. It had caramelized onions and morbier cheese on it. They also have some special mustard... that was on it too.
It was truly Godly.
Make a reservation fast, they fill up quick!


I apologize for the horrific pictures of this recipe.
It just happens to not be very photogenic. You can't blame it for that.


Baked french toast is basically bread pudding. It may appear to be coffee cake, but it is SO not coffee cake.
The edges get really crispy as you can see a little in the picture above.
But, then you reach the custardy, gooey, mad insides.


Berries are something I added extra, you don't have to do that. My sister likes it better with them, I like it better without. You can also add butter and syrup if you wanna go a little crazy,
You can prepare this the night before but if you do so, wait to put the cinnamon topping on until the morning!

Baked French Toast 

Yields 10 servings
  • 14 slices Oldish Bread, I used half oatmeal/half whole wheat, you can use white or whatever kind you want.
  • 8 Large Eggs
  • 1 1/2 cup Buttermilk
  • 1 cup Skim Milk or 2%
  • 2 tablespoons Ground Cinnamon
  • 2 tablespoons Vanilla
Butter a 9x13 inch pan and lay the bread slices evenly across, overlapping at the ends. Alternately, you can rip up the bread and just sort of throw chunks around until it forms an even layer (probably easier, but not as pretty?). In a large bowl, whisk together the eggs, buttermilk, milk, cinnamon and vanilla. Pour this mixture evenly over the bread. Cover with plastic wrap and refrigerate while you make the crumb topping!

Crumb Topping

  • 1/2 cup Unsalted Butter, cold and cut into small piees
  • 1/2 cup All Purpose Flour
  • 1/2 cup Light Brown Sugar
  • 2 tablespoons Cinnamon
  • 1 teaspoon Salt
  • 1 cup Mixed Berries, this is optional. I used blueberries and raspberries.
Preheat the oven to 350.

Place butter, flour, brown sugar, cinnamon, and salt in a small bowl. Mush together with your hands until you form small crumbs. This task is not as daunting as it sounds! 
Sprinkle berries, if you're using, over the french toast. Then top by sprinkling bits of the crumb topping over the berries/toast. 
Bake for about 45 minutes-1 hour. depending on how crispy you want it. I baked for 45 minutes at 350 then increased the temp to 375 and took it out when it reached that temperature. It gave it a nice crispy layer over the top!


Thursday, June 13, 2013

Decorating Tutorial

I have had the unfortunate experience of waking up an hour before my alarm is set to go off.
I don't know why this happens but, oh my god, I am so tired.
Last night I stayed up for the first game of the Stanley Cup Finals...
obviously rooting for the best team.


However, by the time the game was into third overtime, I had to say good night.
But we won!!!!
And I am so tired!!!!
I've been told I need to make some Blackhawks cookies soon... so refer to this tutorial if you want to as well!

When I decorate sugar cookies, I like to pipe royal icing on as decorations. I use a few simple sprinkles/glitter flakes/sanding sugars/fondant flowers... but mostly I stick to icing.

I put my recipe for royal icing with my post about sugar cookies, but honestly, you have to experiment a little. You might need a little more water, and then a little more powdered sugar. You want to get the icing to a good consistency when you start the outlining of the cookies.

But let me back up and start with piping materials.
I always have on hand Wilton Round Tips (#1, #2, and #3) usually two-three of each, about 10 piping bags (plastic or parchment), and about 3-4 couplers... this is what a coupler looks like
These help to secure on your piping tips and ensure even piping.
I also have toothpicks or a few chopsticks on hand to help when flooding the cookies.

What is flooding might you ask?
Okay, so once you get the royal icing to a consistency that is thick enough to hold its shape when you drizzle it around, you want to place about a half cup in to a piping bag, fitted with a coupler and a #2 tip.

Outline your cookies.


You can do all kinds of fun stuff.

You should let these outlines dry for about 10 minutes, then you can begin the flooding. For flooding I like to have super drippy icing. Not watery-drippy, but like, very thin.
You scoop a little out on the cookie, or pipe a bunch on using a #3 tip. Let this thin icing spread out on its own and then you can use a toothpick/chopstick to push it in to the edges.


You need to let this icing dry for a while before you begin adding smaller decorations on top. You can however, pipe onto the wet icing if you want the decorations to be flat rather than raised. Like this:

See how the dots and the background are all on one delicious level? Then the collar was placed on after the dress dried to form a new delicious level...

Or you can take your #1 tip, fill it with that thicker-outlining icing, and pipe decorations on top.


I also decorated that cookie with some little fondant flowers. 
I didn't use any sprinkles on these cookies but I did attempt to use glitter flakes...


Enter at your own risk... The cookies need to be COMPLETELY dry before you use these

Here are some other cutie pics, and I hope this tutorial was a little helpful. Please comment with any questions, I'm working on clearing up my directions!


Attempting lace?