I have had the unfortunate experience of waking up an hour before my alarm is set to go off.
I don't know why this happens but, oh my god, I am so tired.
Last night I stayed up for the first game of the Stanley Cup Finals...
obviously rooting for the best team.
When I decorate sugar cookies, I like to pipe royal icing on as decorations. I use a few simple sprinkles/glitter flakes/sanding sugars/fondant flowers... but mostly I stick to icing.
I don't know why this happens but, oh my god, I am so tired.
Last night I stayed up for the first game of the Stanley Cup Finals...
obviously rooting for the best team.
However, by the time the game was into third overtime, I had to say good night.
But we won!!!!
And I am so tired!!!!
I've been told I need to make some Blackhawks cookies soon... so refer to this tutorial if you want to as well!
When I decorate sugar cookies, I like to pipe royal icing on as decorations. I use a few simple sprinkles/glitter flakes/sanding sugars/fondant flowers... but mostly I stick to icing.
I put my recipe for royal icing with my post about sugar cookies, but honestly, you have to experiment a little. You might need a little more water, and then a little more powdered sugar. You want to get the icing to a good consistency when you start the outlining of the cookies.
But let me back up and start with piping materials.
I always have on hand Wilton Round Tips (#1, #2, and #3) usually two-three of each, about 10 piping bags (plastic or parchment), and about 3-4 couplers... this is what a coupler looks like
These help to secure on your piping tips and ensure even piping.
I also have toothpicks or a few chopsticks on hand to help when flooding the cookies.
Okay, so once you get the royal icing to a consistency that is thick enough to hold its shape when you drizzle it around, you want to place about a half cup in to a piping bag, fitted with a coupler and a #2 tip.
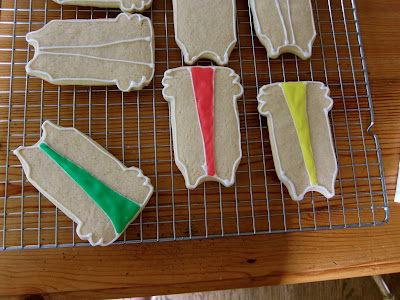
Outline your cookies.
You can do all kinds of fun stuff.
You should let these outlines dry for about 10 minutes, then you can begin the flooding. For flooding I like to have super drippy icing. Not watery-drippy, but like, very thin.
You scoop a little out on the cookie, or pipe a bunch on using a #3 tip. Let this thin icing spread out on its own and then you can use a toothpick/chopstick to push it in to the edges.
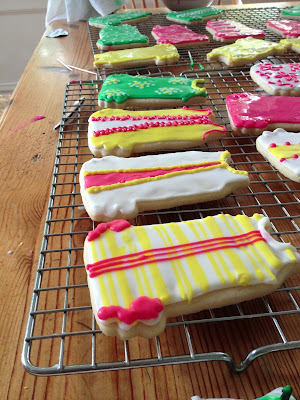
You need to let this icing dry for a while before you begin adding smaller decorations on top. You can however, pipe onto the wet icing if you want the decorations to be flat rather than raised. Like this:
See how the dots and the background are all on one delicious level? Then the collar was placed on after the dress dried to form a new delicious level...
Or you can take your #1 tip, fill it with that thicker-outlining icing, and pipe decorations on top.
I also decorated that cookie with some little fondant flowers.
I didn't use any sprinkles on these cookies but I did attempt to use glitter flakes...
Enter at your own risk... The cookies need to be COMPLETELY dry before you use these
Here are some other cutie pics, and I hope this tutorial was a little helpful. Please comment with any questions, I'm working on clearing up my directions!
Attempting lace?


No comments:
Post a Comment