Saturday, December 28, 2013

Asparagus Pancetta Gruyere Breakfast Strata

Christmas breakfast is the most amazing meal of the year!


I decided to make a breakfast strata similar to one some family friends make. Ended up buying some of the ingredients and just throwing them together, hoping it would turn out as good as theirs. 

It was delicious!! We always have cinnamon rolls at Christmas. But I was not feeling the sugary treats. I wanted the magnificence of this savory delight to last forever. I might make one tomorrow. And for New Years Day. And every Sunday for the rest of my life. 

If you know me at all, you will probably know that I have an incredible affection for the Christmas season. However, I am not one of those people that gets sad when it's over. It basically just means that we are that much closer to the next Christmas! I do not really understand why people are not as joyful as they are at Christmas all the time! I know I am!

So I am going to continue to make holiday treats and spread the spirit.  Enjoy this recipe foodies!


Asparagus Pancetta Gruyere Breakfast Strata

Yields 20 Servings

  • 8 oz. Pancetta, chopped
  • 1 cup Onion, diced
  • 1 tablespoon Butter
  • 8 Large Eggs
  • 2 1/2 cups Nonfat Milk
  • 1 tablespoon Dijon Mustard
  • 1 1/2 cup Gruyere Cheese, shredded
  • 3/4 pound Whole Grain Loaf of Bread, cut into 1-inch cubes
  • 15 Asparagus Spears, cut into 1-inch pieces
  • Salt and Pepper
  • 1/2 cup Asiago Cheese, shredded

    Butter a 9x13" baking dish.

    In a small pan cook the pancetta on medium-high heat for about 4 minutes. Add the chopped onion and cook until the onion has become soft and translucent. Remove from heat.

    In a large bowl, blend together the eggs, milk, mustard, and gruyere with a handheld mixer. Stir the asparagus and pancetta into the egg mixture. Scatter the bread chunks evenly in your greased baking dish. Pour the egg mixture over the bread till it is evenly coated, try to make sure the asparagus and pancetta is spread about evenly as well! Cover in plastic wrap and let chill in fridge for at least 12 hours, or overnight. 

    When you are ready to bake, remove from the strata from the fridge and let sit at room temperature while the oven preheats to 350 degrees. Sprinkle the strata with the asiago cheese, and season with salt and pepper. Bake for 40-45 minutes until the strata no longer jiggles in the middle. It should be firm when touched and the edges should be golden. Enjoy!


    Sunday, December 22, 2013

    Russian Tea Cakes

    Buttery, flakey, nutty, sweet mounds of heaven...


    For me, this used to be one of those reject Christmas cookies. You go to a holiday party and if you are me, you head straight for the dessert table. You see gingerbread men, sugar cookies, peppermint fudge... all the celebrated regulars. Then as you continue perusing the sweets, you come across the rejects: fruit cake, cherry cordials, almond logs, all those other weird cookies and then, the russian tea cakes. 

    It wasn't until high school that I ventured down to this end of the table. I was learning the set backs to being a picky eater. I decided to give these cookies a try. I was obviously pleasantly surprised. These are the best cookies maybe in the whole world? They are the perfect texture, they have a cinnamon and nutty flavor and then are coated in the most delicious layer of buttery powdered sugar. I never looked back after entering this end of the table. Just give it a chance!

    Fresh warm out of the oven they are seriously better than anything. Maybe make two batches, one to eat warm and one to eat the next day. 

    Enjoy! Happy Holidays!


    Russian Tea Cakes

    Yields 3 Dozen Cookies

    • 1 cup Pecans or Walnuts, toasted
    • 1 cup Salted Butter, softened
    • 1/2 cup Powdered Sugar
    • 1 teaspoon Cinnamon
    • 1/2 teaspoon Freshly Grated Nutmeg
    • Sprinkle of Cloves
    • 1 teaspoon Vanilla
    • 2 cups All-Purpose Flour
    • 1 1/2 cups Powdered Sugar
    Preheat your oven to 350 degrees. Line two baking sheets with parchment paper.

    In a food processor, blend your nuts until they are finely diced, set aside.
    In a large bowl, blend your butter, 1/2 cup of powdered sugar, cinnamon, nutmeg, cloves, and vanilla on medium-high speed until light and fluffy, about 3-5 minutes. Gradually add the flour about a half cup at a time until just mixed. Add your chopped nuts and blend until combined.

    Roll 1-inch sized balls and place on the cookie sheet an inch apart. Bake for 8-10 minutes. While they are baking, pour your remaining 1 1/2 cups of powdered sugar into a small bowl. The tops should just begin to crack and the cookies should be golden on the bottom. Right when you take them out of the oven, roll the cookies in the powdered sugar until heavily coated (I like lots of powdered sugar!). Let cool for a little so you do not burn yourself, but have a few of them warm, they are SO good warm!

    If you have extra powdered sugar at the end you can use a fine sieve to dust the rest over the cookies.

    Friday, December 20, 2013

    Cranberry White Chocolate Pistachio Cookies

    Holiday baking is my favoriteeeee!


    There are just so many flavors to use. I guess you could use them at any time of the year, but people definitely appreciate them more in December.

    Actually, people just appreciate baked goods more in general in December. Like, I am genuinely curious why I am the only one craving gingerbread cookies in July and fudgesicles in January?
    These delicious treats always taste good.
    I clearly do not adhere to the whole 'getting old of things' phenomenon.

    These cookies are perfect because they have red, white, and green ingredients.


    They are also perfect because they take less than two hours to make.
    And!
    They are perfect because of white chocolate...

    Hope you nutcrackers enjoy!
    Happy Holidays!


    Cranberry White Chocolate Pistachio Cookies

    Yields about 4 Dozen Cookies

    • 2 1/2 cups All-Purpose Flour
    • 1 teaspoon Baking Soda
    • 1 teaspoon Salt
    • 1 teaspoon Cinnamon
    • 1/2 teaspoon Nutmeg, freshly grated
    • 1/2 teaspoon Cloves
    • 1 cup Unsalted Butter, melted and cooled
    • 1 cup Granulated Sugar
    • 3/4 Dark Brown Sugar
    • 1 Large Egg and 1 Egg Yolk
    • 1 teaspoon Vanilla
    • 1 cup White Chocolate Chips
    • 1 cup Dried Cranberries
    • 1/2 cup Salted Pistachios, chopped
    Preheat oven to 350 degrees. Line two baking sheets with parchment.

    In a small bowl, whisk together the flour, baking soda, salt, cinnamon, nutmeg, and cloves.

    In a large bowl, blend together the butter and sugars until light and fluffy, about 3-4 minutes on high. Reduce speed and add the egg and egg yolk. Mix until combined. Scrape down the sides and slowly add the flour mixture with the mixer on low. When there is still a bit of flour remaining add the chips, cranberries, and nuts. Stir with a spatula until just combined. 

    Drop about 1 tablespoon sized balls onto a cookie sheet 1 1/2 inches apart. Bake for 8-10 minutes until edges are golden. Let cool before eating!


    Wednesday, December 18, 2013

    Spinach Artichoke Canapés

    My mouth is watering over these delectable little cheesy bites.


    I have just been staring at these pictures, reminiscing about what went down with them yesterday... Like seriously, I just shed a tear.

    I love spinach artichoke dip.
    I love crispy shells.
    I love cheese.

    We are obviously meant to be.

    These are maybe the easiest thing you will ever attempt to make. You can prepare them and bake them in under an hour. Once that hour is up your life will be changed!
    Maybe I am overreacting a little.

    They are the perfect little treat to bring to a holiday party. You can serve them hot, warm, or cold and they will still taste just as delectable. AND!
    I am forgetting the best part!!

    Once you have filled the unbelievably cute phyllo dough shells, there will be so much extra dip you can bake in a bowl all for yourself! Just use some pita chips as dippers.

    I used the word, 'canapés,' because in England that is what they call an hors d'oeuvres. I am really trying to emulate the English here. It is a life long dream that will be fulfilled. It also perfectly describes what these are! Canapés are small, prepared, decorative foods that are often eaten in one bite! These should definitely be eaten in one bite, that way you can eat more of them, faster.

    Anyway... whether you serve these at a party, Christmas dinner, or just make them to eat all by yourself, they are perfect little treats. Hope you all enjoy!


    Spinach Artichoke Canapés

    Yields 30 Canapés

    • 30 Mini Phyllo Dough Shells, thawed
    • 2 cups Parmesan Cheese, grated
    • 10 oz. Chopped Spinach, thawed and drained
    • 14 oz. Artichoke Hearts, drained and chopped
    • 2/3 cup Light Sour Cream
    • 1/3 cup Light Miracle Whip
    • 8 oz. Light Cream Cheese
    • 2 teaspoons Garlic Powder
    • 1 teaspoon Dried Onion Flakes
    • 1/2 cup Asiago Cheese, grated
    Begin by preheating your oven to 375 degrees. Place the shells on a lined baking sheet about a 1/2 inch apart. 

    In a large bowl, blend together the parmesan cheese, chopped spinach, and artichoke hearts with a hand mixer. Add the sour cream, miracle whip, and cream cheese and blend until smooth. Sprinkle the spices over the top and season with just a touch salt and pepper. Blend until all is mixed together. 

    With a small ice cream scoop, spoon about a tablespoon of the mixture into the shells. They should mound over a little on the top. Be careful not to break or crack the shells. Sprinkle with asiago cheese. 

    With the remainder of your dip you can pour it into a baking dish and sprinkle with asiago. This can be saved to bake later or you can bake it with the canapés. 

    Bake in oven for about 15 minutes. Then turn on the broiler on high. Bake until the cheese begins to brown and boil. 


    Sunday, December 8, 2013

    Cranberry Bliss Bars

    Hello!

    After a long, probably not very needed, break... I am back!
     I have been in London studying for a term. Learned a lot seen a lot. Popped over to Paris and had some delicious pastries that I hope to one day emulate. I could easily write for years about the wonderful experiences I have had in London.
    However...

    This is first and foremost a baking blog. And that is what it will continue to be!

    So again. I am back! To bring you all the most delectable Christmas recipes! 


    If you have ever had the Cranberry Bliss Bars from Starbucks, you know that they are easily one of the most amazing, delicious, christmassy treats in the world. With Starbuck's new 'Boulangerie' food section, who knows if we will ever see them again! (I am actually still in London so I do not actually know if they have them... forgive me.)

    I have recreated these holiday treats and it is absolutely the simplest recipe ever.

    You start with a normal blondie recipe. Add some cinnamon to get that yuletide flavor moving. Throw in loads of cranberries and white chocolate chips. Bake them to perfection. Normally blondies are slightly underbaked, but for these you want to cook them about 5 minutes longer than normal.

    Once they've cooled you add a smooth, creamy cream cheese frosting. Sprinkle some more cranberries. Then drizzle the lot with warmed white chocolate.

    Are you drooling?

    I am.

    Cranberry Bliss Bars

    Yields about 24 bars

    Blondie Layer:
    • 3/4 cup Salted Butter, room temperature
    • 1 1/2 cups Light Brown Sugar, packed
    • 2 Large Eggs
    • 3/4 teaspoon Vanilla Extract
    • 2 1/4 cup Flour
    • 1 1/2 teaspoon Baking Powder
    • 1/4 teaspoon Salt
    • 1/2 teaspoon Cinnamon
    • 1/2 cup Dried Cranberries
    • 1 cup White Chocolate Chips
    Frosting Layer
    • 4 oz. Cream Cheese
    • 1/2 cup Salted Butter
    • 1 cup Powdered Sugar
    • 1/2 cup Dried Cranberries
    • 1 cup White Chocolate Chips, melted
    Preheat your oven to 350 degrees. Butter a 9x13" metal pan and line with parchment paper.

    Beat the butter and brown sugar in the bowl of a stand mixer until pale and fluffy. Add eggs one at a time, beating well after each addition. Add the vanilla and beat on medium speed until incorporated.

    In a separate bowl whisk together the flour, baking powder, salt, and cinnamon. Slowly add to the butter mixture, mixing at a low speed. With a spatula fold in white chocolate and cranberries. 
    Pour  mixture into pan and spread evenly. Bake for 18-20 minutes. Bars should be golden brown and a toothpick will come out clean when inserted. Let cool completely while you make the frosting!

    Blend cream cheese, butter, and powdered sugar in a bowl. Spread over cooled bars. Sprinkle cranberries over the top evenly. Then drizzle the white chocolate on top.

    Happy Holidays!


    Thursday, August 22, 2013

    Dark Chocolate Tart

    Unless you are one of those insane people who claim that they "don't like chocolate," you are going to love this dark chocolate tart.


    Actually, if you are one of those people, this tart will transform you into a chocolate lover.
    ... I hope.
    If not just eat the raspberries and let's call it a day.

    This lovely tart has an Oreo cookie crust. Not a chocolate wafer crust, because the delicious Oreo cream is included.


    This entire recipe is unbelievably easy. In total it took me about 10 minutes to put together. There are only 5 ingredients used: butter, heavy cream, chocolate, Oreos, and raspberries. 
    You do not need to use raspberries, you could use any fruit or no fruit, or just add some extra chunks of chocolate on top... if you are crazy.


    While eating this tart I paired it with some baked brie that I made.


    Aren't I healthy?

    Who knows what I will bake next, any suggestions? Requests?


    So pretty!

    Dark Chocolate Tart

    Adapted from Buttercream Bakehouse
    Serves about 16
    • 10 oz. Oreos (roughly 2 1/3 sleeves of Oreos)
    • 1/2 cup Salted Butter
    Butter or spray a small tart pan making sure the sides are well greased. 
    Using a food processor blend the Oreos and butter together until a sandy mixture forms. Press into the tart pan and up the sides so you have a nice well in the middle.

    • 6 ounces Heavy Cream
    • 7 ounces Dark Chocolate, I use Scharffen Berger 70%, chopped
    • 1/4 cup Salted Butter
    • 1 cup Raspberries (fruit of your choice)
    Place the heavy cream in a small saucepan over medium heat. Whisk for a few minutes until it starts to boil. Remove from heat and add chocolate and butter. Let stand for 5 minutes. Slowly whisk from the center out until you get a creamy, smooth chocolate mixture. 

    Pour filling into the Oreo crust and smooth over. Add fruit now or place in fridge. Let cool for at least 2 hours. You can sift powdered sugar or cocoa powder over the top once its cool.

    Check me out on Instagram! @challengersweets


    Monday, August 12, 2013

    Blueberry Crumble Bars

    I've always had a little bit of a thing for crumb topping.


    I also sort of, kind of, might have a thing for blueberry filling.
    And shortbread crust...
    So when I met these bars, we fell in love.
    I chose to use a shortbread crust that had oats in it because I thought that would give it a nice texture. This crust definitely goes well with fruit whereas a plain shortbread crust goes better with chocolate and caramel.

    I made these bars up at my friend's lake house. We spent the weekend cooking and baking and it was all delicious and amazing. We ate the most amazing baked brie I have ever eaten. This was one of the things we did not put together but I am still speechless at how preeeetty it is...


    Seriously a work of art.
    One morning we had this delicious egg strata. It had prosciutto and asparagus and asiago and just here is the recipe. It's suuursly unreal!
    I know I have been posting less and less, and I want to explain that I have been so busy. Plus a lot of the baking I have been doing is for events and parties. I usually make decorated sugar cookies and you have all seen those before! 

    Recently I made some cookies for a graduation party. The young woman is going to my rival college so I felt like a trader making these cookies. 


    It just seems so wrong!


    But this doesn't.


    Blueberry Crumble Bars

    Recipe Adapted From Hungry Gems.
    Yields about 24 bars.

    Shortbread Crust
    • 2 cups Old Fashioned Oats
    • 3/4 cup Flour
    • 3/4 cup Light Brown Sugar, packed
    • 1/2 teaspoon Baking Powder
    • 10 tablespoons Salted Butter, softened (1 1/4 sticks)
    • 1 teaspoon Vanilla

    Blueberry Filling
    • 2 pints Fresh Blueberries
    • 1 teaspoon Vanilla
    • 3/4 cup Granulated Sugar
    • 3 tablespoons Flour
    • 1 teaspoon Cinnamon
    • 1 teaspoon Freshly Grated Lemon Zest
    Crumb Topping
    • 1 cup Flour
    • 3/4 cup Light Brown Sugar, packed
    • 1 stick Salted Butter, cold and cubed
    Preheat oven to 350. Butter a 9x13 inch pan.
    Whisk together oats, flour, brown sugar, and baking powder. Add the butter and vanilla and blend until combined. Place in pan and press firmly until evenly distributed.

    Stir together blueberries and vanilla. Add sugar, flour, cinnamon, and zest. Fold until combined. It's okay if some of the blueberries burst, they'll just burst once they're in the oven! Pour this mixture over the crust layer.

    Whisk together the flour and brown sugar. Toss in the butter cubes. With your hands or a pastry cutter, mash together the butter and flour mixture until it resembles sand. Grab chunks and sprinkle them over the blueberries evenly.

    Bake for about 20-25 minutes until lightly browned and the blueberries are bubbling. Let cool then cut and serve!

    Tuesday, July 30, 2013

    Chocolate Crinkles Version 1

    I call this version one because I am working on an experiment with these decadent chocolate cookies.


    These cookies are a holiday classic. You can make them with chocolate chips, cherries, or sprinkles and they are always delicious and moist and chewy and ahhhh.


    I just started reading Tina Fey's book, Bossypants.
    It is hilarious. I was laughing by myself on the train yesterday and I am pretty sure the people surrounding me thought I was insane. But, it is seriously just so funny. She is great. And, if you have never watched 30 Rock before... watch it. Now.
    The entire book is witty and colloquial. She is honest, and not bearing-her-soul-uncomfortable-honesty, but more like tells-the-truth-and-embarrasses-herself-in-a-comforting-and-personable-way-honesty.
    Sorry if that was confusing.
    Anyway, buy the book, it is moronic but in the best way.


    Okay so these cookies are delightful. Experiment with them if you like and I will share my special version soon.


    Chocolate Crinkles Version 1

    Adapted From Martha Stewart: Cookies
    Yields about 48 cookies
    • 8 oz. Quality Dark Chocolate (Scharffen Berger's 70%)
    • 1 1/4 cup Flour
    • 1/2 cup Unsweetened Cocoa Powder
    • 2 teaspoons Baking Powder
    • 1 teaspoon Salt
    • 1/2 cup Salted Butter, room temperature
    • 1 1/3 cups Light Brown Sugar, packed
    • 2 Large Eggs
    • 1 teaspoon Vanilla
    • 1/3 cup Milk
    • 1/2 cup Sugar
    • 1 cup Powdered Sugar
    Melt chocolate in a double boiler until smooth. Set aside to cool.
    In a small bowl, whisk together the flour, cocoa powder, baking powder, and salt.
    In a larger bowl, mix the butter and brown sugar together with an electric hand mixer until light and fluffy. Add eggs one at a time until smooth. Whisk in the vanilla. Mix in the chocolate and blend till smooth. Scrape down the sides and add the flour in two additions, alternating with the milk. 

    Wrap this bowl in plastic and refrigerate for at least two hours.

    When you are ready to bake, preheat your oven to 350. Line a baking sheet with parchment paper
    Roll one inch balls in the sugar and then in the powdered sugar. Place them about an inch apart and bake for 14-15 minutes.
    Let cool before serving.
    Or not.

    BON APPETIT!

    Thursday, July 25, 2013

    Inside Out English Muffin Breakfast Sandwich

    This was one of those ideas that had been brewing in my head for quite a while.


    For about 4 weeks, I have been making myself a tradition egg-in-the-hole/toad-in-the-hole/egg-in-a-window/whatever you call it, every single morning.
    I like to use salty butter because brings out a lot more flavor.
    I also am a pepper fiend, so I grate a lot of fresh pepper over it.

    I've heard that some people put syrup on theirs.
    My dad said he did that when he was little.
    I guess it sort of makes sense? It is basically french toast!

    Anyways, this little breakfast sandwich is not very complicated!
    Follow the steps carefully and you will have a delicious little breakfast sammie.


    P.S. this is what it should look like before it is cooked!

    Inside Out English Muffin Breakfast Sandwich
    • 1 English Muffin, I use Bays
    • 1 slice Cheddar or American Cheese
    • 3 tablespoons Salted Butter, room temperature
    • 1 Large Egg
    Start by putting a large skilled on the stove at medium heat.

    Pull the english muffin apart and spread a tablespoon+ of butter on either the cut side. Put the backs of the muffins together and place a slice of cheese in between. To cut the hole in the center, you can use a little circular cookie cutter. However, I find that is easier to use a sharp knife to cut a circle, but be very careful! Save the circle if you want to cook that too!

    When you are ready, spread a little butter on the griddle and place the sandwich on top, turn the heat up to medium-highish. Quickly crack an egg into the center and let sit for about 2 minutes. (You can place the center you cut out on now as well) Flip and grill on the other side as well for 2 minutes. You want to be careful not to cook the yolk so watch the egg.

    Serve with salt and pepper! Or Lawrys Seasoned Salt! Yummmmm!


    Wednesday, July 24, 2013

    Caramel Cake

    I feel like this post needs some sort of special recognition.


    Whenever someone asks me what my "specialty" is, my immediate response is, "CARAMEL CAKE!"
    It is literally so perfectly good.
    The cake is moist because you gently fold the egg whites into the batter.
    The frosting deserves to be famous. It is a brown sugar frosting, also known as penuche.
    It is made by boiling brown sugar into milk and butter.


    Then you add some powdered sugar and spread it over the warm or cooled cake(s).
    I am trying to find words to describe the deliciousness of this cake.
    One of my most obsessed-with-caramel-cake friends, Jenna, was my sous-chef while making this.


    This lady is one of my caramel cake's biggest fans. There are many other, very big fans, but she and her family can devour one the fastest...

    The yellow cake base is probably the best yellow cake recipe I have ever made.
    Like better than America's Test Kitchen...

    You don't have to put the frosting on it, you could use anything, but... why wouldn't you use the most amazing frosting in the world...

    You can stack round or square layers, but if so you can't frost the sides.
    You could frost individual round or square layers and give them away separately.
    Or you can just eat it straight out of a 9x13" pan.


    Caramel Cake

    From Birthday Cakes: Recipes and Memoirs from Celebrated Bakers
    Yields about 24 Servings

    Cake Ingredients

    • 2 2/3 cups All Purpose Flour
    • 2 teaspoons Baking Powder
    • 1 teaspoon Salt
    • 1 cup Salted Butter, room temperature
    • 2 cups Sugar
    • 4 Large Eggs, separated
    • 1 cup Milk
    • 1 teaspoon Vanilla
    Preheat oven to 350. Butter and flour your desired pan(s), you can either use 1-9x13" pan, 3-8" square pans, 3-8" round pans, or 24 muffin cups.

    In a small bowl whisk together the flour, baking powder, and salt.
    In a larger bowl, blend the butter and sugar together until light and fluffy. Add the egg yolks one at a time, blending well after each addition. Scrape down the sides. Now add the flour and the milk, alternating between the two, starting and ending with the dry ingredients. Whisk in the vanilla.

    In a separate bowl, beat the egg whites until they are stiff and form peaks, but not dry. Gently fold these in to the batter. 

    Pour batter into pans evenly and smooth the tops with a rubber spatula.
    Bake for about 20-40 minutes (the 9x13" pan takes about 40). The cake should be golden and a cake tester should come out clean, with no crumbs. You can make the frosting while the cake is baking.

    Caramel Frosting Ingredients
    • 1/2 cup Salted Butter
    • 1 1/2 cups Dark Brown Sugar, packed
    • 1/2 cup Milk
    • 4 cups Powdered Sugar
    Melt the butter in a medium saucepan over medium heat. Add the brown sugar and milk and bring the mixture to a boil. This helps dissolve the sugar so your frosting isn't grainy. Once it boils set it aside to let it cool.

    When the cake comes out of the oven, add the powdered sugar to the brown sugar mixture. Wait for the cakes to cool and then spread it over the tops. This frosting is not very spreadable. You likely won't be able to get it around the sides of the cake but that is okay! It tastes PERFECT, and looks rustic!

    Tuesday, July 23, 2013

    Banana Nutella Muffins

    Just make these now.


    Unfortunately, I am slightly allergic to bananas.
    When I eat them my tongue gets all tender and itchy.
    I probably shouldn't eat them at all, but they're so delicious!

    The weird thing is, when I eat banana bread/cake/muffins/cookies/etc. I don't get that itchy, tender feeling!
    I don't know what it is but it just doesn't happen, maybe some part bakes out or I don't know.
    It is an incredible thing.

    I am not as big of a nutella fan as I was when I was little.
    My mom used to buy jars of it with graham crackers and pretzels. My siblings and I would come home from school and have this delicious, yet incredibly unhealthy... after school snack.
    I'm sure at some point I have had a nutella and banana crepe or sandwich.
    It is a perfect combination!

    You could replace nutella with peanut butter, or almond butter... or neither.
    You could add nuts, chocolate chips, or whatever you like!
    This banana muffin recipe is super versatile so feel free to let those creative juices flow.

    Happy Breakfast!!

    Banana Nutella Muffins

    • 2 cups Flour
    • 1 teaspoon Baking Soda
    • 1 teaspoon Baking Powder
    • 1 teaspoon Coarse Salt
    • 3 Large Bananas, over ripened and mashed
    • 1/2 cup Sugar
    • 1/2 cup Light or Dark Brown Sugar
    • 1 Large Egg
    • 1/4 cup Canola Oil
    • 2 teaspoons Vanilla
    • Nutella (small jar)
    • 1 cup of Nuts or Chips
    Preheat oven to 350. Line 2 muffin tins with paper liners or spray with nonstick spray.

    Whisk together flour, baking soda, baking powder, and salt in a small bowl.

    In a separate bowl, whisk together bananas, sugar, and brown sugar until combined. Add the egg, oil, and vanilla and whisk until just combined. Carefully sprinkle the flour mixture over the wet mixture and fold until no flour streaks remain. Add nuts or chips if you are using them.

    Use a large ice cream scoop to put about 1/4 cup of mixture into each muffin cup. If you are using nutella, use a smaller ice cream scoop to place about a teaspoon of nutella on each muffin. You can microwave the nutella for about 15 seconds to make it a little smoother. Next take a toothpick and lightly swirl around the nutella and muffin batter. 

    Bake for 15-20 minutes until puffed, golden and no longer jiggly. If you stick a toothpick in it should come out with few to no crumbs.

    Monday, July 1, 2013

    Easy Pizza Dough

    I have been craving homemade pizza for too long now.


    I mean, there is no competition with Lou Malnati's Chicago deep dish, but it is still so satisfying.
    It also isn't super labor intensive which I personally find refreshing.
    If you want to eat this for dinner, I would recommend starting at like 4, that way it will be ready by 7ish.

    I made two kinds of pizza. The first was a simple cheese and tomato sauce pizza.
    Normally I would make my own tomato sauce but I was being extremely impatient.
    I have been out of ingredients for a while. I have had no access to a car and therefore no access to the grocery store (well limited access).
    So, I went with the ingredients I had for the first pizza. I spread some tomato sauce on top and then sprinkled some random organic shredded cheddar and some leftover gorgonzola crumbles.
    YUM!
    Was not expecting this pizza to be as good as it was!


    I had three pieces... whoops.
    They're little pizzas...

    Next, once my brothers arrived with my ingredients, I made a pizza with bacon, blue cheese, fontina, and figs! I got this idea from How Sweet It Is (I also used her dough recipe!)


    I always switch up the dough recipes I use. I haven't settled on one specific that I love. 
    To be honest, I think a lot of basic pizza dough recipes taste the same (and they are divine).

    Have fun making your za! Enjoy a slice for meeeee


    Basic Pizza Dough

    Adapted from How Sweet It Is
    Yields 2 Medium-Sized Pizzas
    • 1 1/4 cups Warm Water (about 110 degrees, microwave at 50% for 40 seconds)
    • 3 teaspoons Active Dry Yeast
    • 1 tablespoon Honey
    • 1 tablespoon Olive Oil
    • 2 1/2 cups All-Purpose Flour
    • 1 cup Bread Flour
    • 1 teaspoon Salt
    Start off by preheating your oven to 150. 
    In a large bowl, combine the water, yeast, honey, and olive oil. Let sit until foamy, about five minutes. Add the 2 1/2 cups all-purpose flour and stir with a wooden spoon until combined. 

    Now, take the bread flour and sprinkle it on a surface. 
    Turn the dough out onto this and knead until all the flour is incorporated. This can take about 3-5 minutes. Then I like to knead my dough (because I am weird and love kneading dough) for about 5 minutes more till it is really smooth and elastic.

    Rub the large bowl with olive oil, place the dough in it and flip it over so both sides are coated. Cover with a wet towel. Turn off the oven and place the bowl inside so it can proof for about 1-2 hours. It should double in size.

    Once it has doubled, punch down the dough and turn it out on to a lightly floured surface. Cut in to two even portions. I roll my dough into two balls and then shape each of them by hand on two separate baking sheets with parchment paper. You can roll it out with a rolling pin if that is easier!

    Let the dough rest, covered with a towel, for 10 minutes while you preheat your oven to 375. You can also place the dough in the freezer at this point if you are going to save it (remember to take the dough out to thaw for about 30-45 minutes when you are ready to use).

    Decorate with desired toppings and bake for 20-30 minutes just on the parchment paper. I use the pans to help take the pizzas out.

    Bon Appetit!

    Saturday, June 29, 2013

    Baked Brownies

    I love brownies.
    I am very specific about what kinds of brownies that I love though.
    My favorite brownies were at Sarah's Pastries and Candies.
    But that lovely shoppe closed... and I am super upset about it

    http://www.tripadvisor.co.uk/LocationPhotoDirectLink-g35805-d1764340-i32809523-Tastebud_Tours_Chicago_Food_Tours-Chicago_Illinois.html#32463616
    I mean woah...

    By the way, I am currently watching the CBS show, The American Baking Competition...
    How can I get involved with this!!!
    Seriously though! I am looking it up and it says that there are local competitions that you need to win first, and you have to have an interesting background... I have an interesting background!
    I am interesting!

    Anyway, help me if you can... this is a sad, public, and embarrassing plea.

    Back to my brownies...
    So this is the classic Baked Brownie recipe, from the lovely Brooklyn Bakers, Matt Lewis and Renato Poliafit. Their cookbooks are the best and you must purchase them NOW, here.
    Seriously next time I am in New York, which will be in a few weeks... I am going to this bakery!
    It's on my bucket list.

    Well, anyway, when I was making these brownies


    My go to recipe! I realized I didn't have any granulated sugar. 
    WHAT?
    Never happens to me. But it did. I was mortified. So I decided to experiment with...
    Turbinado Sugar!
    More commonly known as, Sugar In The Raw.

    It was such a success! As you can see in the picture above, it crystalized as it baked and left the brownies with a delicious crispy crust, but didn't affect the extremely moist, fudgy, chewy insides!

    I also added a good amount of instant espresso to my batter so don't eat these too late at night...
    Good luck fellow bakees!


    Yummmm.

    Baked Brownies
    Adapted from Baked
    Yields about 24 Brownies
    • 1 1/4 cup All-Purpose Flour
    • 1 teaspoon Salt
    • 2 tablespoons Unsweetened Cocoa Powder
    • 11 ounces Dark Chocolate (I use 60-70%, Scharffen Berger is the best!)
    • 1 cup Unsalted Butter, room temperature, cut into pieces
    • 1 tablespoon Instant Espresso Powder
    • 1 1/2 cups Turbinado Sugar (or regular sugar!)
    • 1/2 cup Light Brown Sugar, packed
    • 5 Large Eggs, room temperature
    • 2 teaspoons Vanilla Extract
    Preheat oven to 350. Line a 13x9" pan with parchment paper and butter the bottom and sides.

    Whisk together flour, salt, and cocoa powder in a small bowl. Place the chocolate, butter, and espresso powder in a large heat proof bowl. Melt in the microwave on high in 30 second intervals until smooth, stirring in between each interval. Add the sugars to the butter mixture and whisk until blended. Add three eggs and whisk until combined. Whisk in the vanilla. Add the remaining eggs and whisk until just combined. Do not over mix your batter! The brownies will be too airy and not fudgy!

    Now, sprinkle the flour mixture over the top of the chocolate mixture. Carefully fold the flour in and again, do not over mix! You should still have a few streaks of flour when you pour the batter in to the pan. Spread the batter evenly and place in the oven for 30 minutes! Don't over bake them, just trust that 30 minutes is going to be enough! If you're really unsure and your oven's temperature is off, a toothpick inserted into the center should come out with a few moist crumbs!

    Let cool and serve! 

    Thursday, June 27, 2013

    GO BLACKHAWKS Sugar Cookies

    What did I do last night?


    I may or may not have seen the Stanley Cup at The Wit...


    And stalker-ly took this picture of Toews...


    And danced near with Shaw...


    And partied with Viktor Stalberg....


    And his mom!

    But the best part of this crazy night, was sitting in a corner with Seabrook's mom for fifteen minutes showing her my blog/these cookies!


    This is just my basic sugar cookie recipe that I have already posted here!
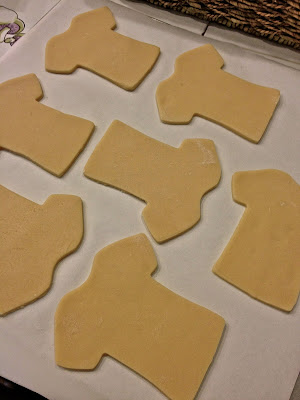
    I cut out the dough using my jersey cookie cutter.


    After coating them in a thick layer of white royal icing, I piped a few of these cutie Hawks logos!
    I used parchment paper with a printed image underneath to get them perfect.
    Check out my tutorial to learn how to do this!


    (I didn't have room for the orange feather!)

    I let these dry overnight and then I carefully peeled them off and used some more icing to adhere them to the center of the cookies! Then I did some fun other decorations just for kicks!

    GO HAWKS!


    Hjalmarsson Baby!

    See you all at the parade tomorrow!